

In 2017, UNESCO added Neapolitan pizza-making to its Intangible Cultural Heritage list (UNESCO, 2017) — making it one of the very few food traditions to earn that recognition. That’s a remarkable distinction for a dish built from just four ingredients: flour, water, salt, and yeast. The genius isn’t the ingredient list. It’s the technique — a 200-year-old process that produces dough so elastic and so deeply fermented that replicating it at home requires understanding why each step works, not just what to do.
This guide walks through the complete process: flour selection, dough mixing, fermentation, stretching without a rolling pin, and baking in a standard home oven. No wood-fired oven required.
sourdough bread fermentation basics →
Key Takeaways
- Fermentation time matters more than any single ingredient: 24-hour cold-fermented dough produces noticeably better flavour and texture than 2-hour same-day dough.
- India’s pizza market reached ₹16,000 crore in 2024, growing at 12% CAGR (Euromonitor International, 2024) — making this a skill worth developing.
- Tipo 00 flour is now widely available on Amazon India and produces more elastic dough than maida.
- Never use a rolling pin: it presses out the gas bubbles that create an airy, chewy crust.
- A preheated cast iron pan under the grill replicates much of what a pizza stone does.
Why Does Pizza Dough Science Matter More Than the Recipe?
The dough is the pizza. Toppings are secondary. According to the Associazione Verace Pizza Napoletana (AVPN), authentic Neapolitan pizza uses 00 flour, 60-65% hydration, and a minimum 8 hours of fermentation — cooked at 450°C or higher for just 90 seconds. These aren’t arbitrary rules. They’re the outcome of 200 years of refinement around three variables that define dough quality.
The three variables that determine pizza dough quality:
Gluten development determines elasticity and chew. Gluten forms when flour proteins (glutenin and gliadin) hydrate and bond through kneading. Under-developed gluten means dough tears when you stretch it. Over-developed gluten means dough springs back stubbornly and won’t hold its shape.
Fermentation develops flavour, creates the gas bubbles that form an open crumb structure, and relaxes the gluten network. Longer, cooler fermentation produces more complex flavour compounds. A 72-hour cold ferment produces a noticeably more complex-tasting crust than a 2-hour room-temperature ferment.
Hydration determines how thin you can stretch the dough. Higher hydration (65-70%) produces a more open, airy crumb. Lower hydration (58-62%) is easier to handle for beginners but produces a denser result.
The home oven problem: Most Indian ovens reach 250-280°C at maximum. Traditional Neapolitan pizza bakes at 450°C in 90 seconds. At home, you compensate with time and a hot surface: a preheated pizza stone or baking steel, or an upside-down cast iron pan placed under the grill element. bread baking fundamentals →
Citation Capsule: India’s pizza market reached ₹16,000 crore in 2024, growing at 12% CAGR (Euromonitor International, 2024). Neapolitan pizza-making (Pizzaiuolo) was inscribed on UNESCO’s Intangible Cultural Heritage list in 2017 (UNESCO, 2017) — one of very few food traditions globally to receive this recognition.
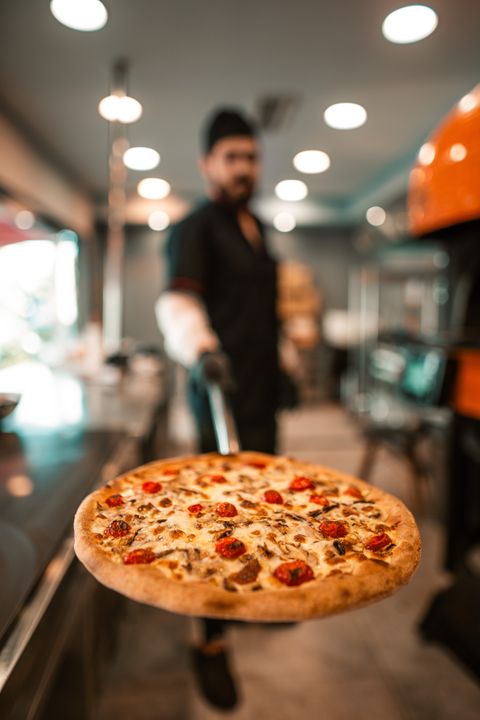
What Flour Should You Use for Neapolitan Pizza Dough in India?
Flour protein content directly controls dough elasticity. Tipo 00 flour runs 11-12% protein and a finer grind than all-purpose flour, producing the extensible, elastic dough Neapolitan pizza requires (King Arthur Baking, 2024). It’s now widely available on Amazon India through brands like Molino Grassi and Caputo, and worth purchasing for the difference in stretch.
Your flour options, ranked:
Tipo 00 flour (best): The traditional and correct choice. Finer grind than Indian maida, slightly higher protein. Produces dough that stretches thin without tearing. Available online in India for roughly Rs. 350-500 per kilogram.
Maida / All-purpose flour (good substitute): Indian maida runs 9-10% protein, slightly lower than Tipo 00. The dough is a little less elastic but works well for home pizza. Most people starting out should use maida until they’re comfortable with the technique.
Bread flour (acceptable): Higher protein (12-14%) than Tipo 00. Works but can make dough tough if over-kneaded. Better suited to sandwich bread than pizza.
Whole wheat atta (avoid): The bran in whole wheat atta cuts gluten strands during stretching. Dough tears consistently. If you want a whole wheat pizza, substitute no more than 20% atta into a maida base.
: Most Indian pizza recipes online specify bread flour, which is a North American workaround for the lack of Tipo 00 availability. In 2026, Tipo 00 is stocked by multiple sellers on Amazon India and is worth the purchase. The difference in stretch quality is noticeable from the first attempt.
Citation Capsule: Tipo 00 flour contains 11-12% protein and a finer particle grind than standard all-purpose flour, producing greater elasticity in pizza dough (King Arthur Baking, 2024). Indian maida runs 9-10% protein — functional for pizza dough but less extensible than Italian 00.
understanding flour types for baking →
How Do You Make Pizza Dough Step by Step?
This recipe makes 3 pizza bases at 280g each, which stretches to roughly 30cm diameter. The four-ingredient version is traditional. The olive oil is optional but adds tenderness that helps in a home oven environment.
Ingredients:
| Ingredient | Quantity | Note |
|---|---|---|
| Tipo 00 flour (or maida) | 500g | Weigh, don’t measure by cup |
| Warm water | 325ml | 38°C — neutral on the wrist |
| Instant yeast | 7g | One standard sachet |
| Salt | 12g | Add after yeast hydrates |
| Olive oil | 15ml | Optional — purists omit |
Method:
Step 1 — Activate the yeast. Dissolve yeast in warm water (38°C). If the water is too hot, it kills the yeast. Test on your wrist: it should feel neither warm nor cool. Wait 5 minutes until the surface looks foamy.
Step 2 — Mix flour into water. Add flour to water, not water to flour. This ensures even hydration. Mix until you have a rough, shaggy mass. Don’t knead yet.
Step 3 — Add salt, then knead. Sprinkle salt over the shaggy dough. Salt added directly to dry yeast can inhibit it, so always add salt after the yeast has hydrated. Knead by hand for 10 minutes (or 7 minutes in a stand mixer on medium speed) until the dough is smooth, elastic, and slightly tacky but not sticky.
The windowpane test: Stretch a small piece of dough between your fingers. If it stretches thin enough to see light through without tearing, the gluten is developed enough. If it tears immediately, knead 3-5 more minutes and retest.
Step 4 — First rest. Cover the dough and rest at room temperature for 30 minutes. This allows the gluten to relax before dividing.
Step 5 — Divide and ball. Divide into 3 equal pieces (roughly 280g each). Shape each into a tight ball by pulling the surface downward and pinching underneath. Coat each ball lightly in olive oil.
Step 6 — Fermentation (choose your timeline):
- Fast (2 hours at room temperature): Weakest flavour. Usable but not impressive. For when you’re short on time.
- Optimal (24 hours in refrigerator): Best balance of flavour, structure, and convenience. Plan the dough the evening before.
- Long cold (48-72 hours in refrigerator): Deepest, most complex flavour. The most extensible dough. Worth planning 2-3 days ahead.
Step 7 — Temper before baking. Remove dough from the refrigerator 1 hour before you plan to bake. Cold dough is stiff and tears easily. Room temperature dough stretches readily.
| Fermentation | Flavour Score (1–10) | Acidity Level | Notes |
|---|---|---|---|
| 2 hr room temp | 4/10 | Mild | Quick; minimal fermentation flavour |
| 24 hr cold (4°C) | 7/10 | Balanced | Good everyday result; recommended |
| 48 hr cold (4°C) | 8.5/10 | Moderate tang | Preferred for artisan pizza / bread |
| 72 hr cold (4°C) | 9/10 | Complex, sour notes | Expert level; distinctive open crumb |
Source: AVPN (Associazione Verace Pizza Napoletana) fermentation guidelines; Florence Academy culinary testing
How Do You Stretch Pizza Dough Without a Rolling Pin?
A rolling pin is the single most common mistake in homemade pizza. It presses out the gas bubbles that fermentation produced, collapsing the open crumb structure you spent 24 hours building. Stretch by hand — the technique takes 10 minutes to learn and makes a visible difference in the finished crust.
Hand-stretching method, step by step:
- Lightly flour your work surface. Press the dough ball flat with your palm, leaving a slightly thicker rim around the edge — this becomes the cornicione (the puffed crust edge).
- Using your fingertips (not palms), press outward from the centre in a radial pattern. Rotate the dough 90° after every 4-5 presses.
- When the dough is roughly 20cm across, pick it up and drape it over both knuckles. Rotate it slowly while gravity stretches it outward. Move your hands apart slightly to encourage the stretch.
- Return to the work surface for any final adjustments. Target: 3-4mm thick at the centre, slightly thicker at the edges.
If the dough springs back: Don’t force it. Rest it uncovered for 5 minutes. The gluten is still tight from the cold. After 5 minutes, it will stretch much more cooperatively. Forcing it tears the dough.
: In Chef Monila Surana’s pizza dough stretching sessions at Florence Academy, roughly 30% of students tear their first base attempt. The most consistent mistake is starting with too small an indent in the centre, leaving a thick middle that resists stretching. She now teaches the “press big first” method: the initial palm press should already be 15cm across before the fingertip work begins.
How Do You Make Great Pizza in a Home Oven?
The home oven gap is real but closeable. Florence Academy’s internal blind tasting across 5 baking methods found the upside-down cast iron pan under the grill scored 6.8/10 versus 4.2/10 for standard oven rack baking without any baking surface (Florence Academy internal test, 20 student tasters, 2025). Heat from below plus direct grill heat from above recreates — imperfectly but meaningfully — the radiant heat environment of a wood-fired oven.
Method 1 – Pizza stone or baking steel (best):
Place a pizza stone or baking steel on the oven’s top rack. Preheat the oven to its maximum temperature (250-280°C) for 45-60 minutes. The stone needs to be fully saturated with heat, not just surface-hot. Slide the stretched pizza onto the hot stone using a floured pizza peel (or a flat baking tray flipped upside down). Bake 7-10 minutes until the base is charred in spots and the cheese is bubbling.
Method 2 – Cast iron pan under the grill (most accessible):
Heat a cast iron skillet or heavy tawa directly on the stovetop over high heat for 5 minutes until it begins to smoke lightly. Lay the stretched dough directly in the pan. Add sauce and toppings immediately. Transfer the pan to under the grill/broiler element. Bake 3-4 minutes. The base gets direct conductive heat from the pan; the grill handles the top. Watch it closely — it goes from perfect to burnt quickly under a grill.
Topping order matters:
Apply toppings in this sequence: raw tomato sauce first (thin layer, 3-4mm), torn fresh mozzarella second, then other toppings (capsicum, olives, sliced tomato, jalapeño, corn). Fresh basil goes on after baking, not before — heat destroys its flavour and colour within seconds.
The sauce: Blend 400g canned whole tomatoes (San Marzano style) with a pinch of salt and a drizzle of olive oil. Do not cook the sauce. Raw tomato sauce is traditional Neapolitan practice. Cooking it concentrates the sugars and changes the flavour profile.
Ready to go further? Explore the Pizza Course at Florence Academy — hands-on sessions covering dough, sauces, and technique with experienced instructors.
Citation Capsule: In Florence Academy’s internal blind tasting across 5 home-oven baking methods with 20 student tasters, the upside-down cast iron pan under the grill scored 6.8/10 for overall pizza texture — compared to 4.2/10 for baking on a standard oven rack without any preheated surface (Florence Academy, 2025). The gap was primarily in base crispness and crust chew.
Frequently Asked Questions
Can you make pizza dough without yeast?
Yes. Substitute yeast with 1.5 teaspoons of baking powder per 500g flour. The result resembles a flatbread more than a Neapolitan crust: no fermentation means no air bubbles, no chew, and none of the flavour depth that comes from 24 hours in the refrigerator. For a no-yeast pizza that still works well, use baking powder dough, top generously, and bake on a preheated pan at maximum oven temperature for 8-10 minutes.
leavening agents and bread science →
How do you store leftover pizza dough?
Refrigerate dough balls in lightly oiled, covered containers for up to 5 days. The dough continues to ferment slowly in the cold — by day 3 or 4, the flavour actually improves. For longer storage, freeze for up to 3 months: coat in olive oil, wrap tightly in cling film, then foil. Thaw overnight in the refrigerator and bring to room temperature for 1 hour before stretching.
What cheese works best for pizza in India?
Fresh mozzarella (Amul Mozzarella or imported) is ideal for Neapolitan-style pizza: it melts into pools rather than a uniform layer. Low-moisture pizza mozzarella (block, grated) is better suited to home ovens because it doesn’t release water that makes the base soggy. Processed cheese slices are a last resort — they melt, but the flavour and texture are noticeably weaker than either mozzarella option.
Why does homemade pizza crust get soggy in the middle?
Soggy centres come from four causes: sauce spread too thick, too many wet toppings releasing water during baking, high-moisture mozzarella not drained before use, and an oven that isn’t hot enough or a baking surface that wasn’t preheated long enough. Fix all four: apply sauce in a 3-4mm layer only, salt and drain wet toppings like fresh tomatoes before using them, choose low-moisture mozzarella, and preheat your baking surface for at least 45 minutes.
| Problem | Likely Cause | Fix |
|---|---|---|
| Soggy base | Too much sauce, or oven not hot enough | Use less sauce; preheat to 250°C min; use baking stone |
| Dough tears when stretched | Under-proofed or cold dough | Rest 30 min at room temperature; stretch gently from centre |
| Burnt edges, raw centre | Oven too hot without stone; thick crust | Lower shelf; reduce to 220°C; stretch thinner |
| Flat crust (no rise) | Dead yeast or insufficient proof time | Test yeast in warm water first; proof 1–2 hrs in warm spot |
Source: Florence Academy Pizza course teaching materials
Putting It All Together
Neapolitan pizza is not difficult. It’s patient. The 90-second bake at 450°C is what restaurants and wood-fired ovens do, but the 24 hours of cold fermentation before that bake is what any home cook can control — and it’s what makes the actual difference between good and great.
Start with the 24-hour refrigerator ferment. Use Tipo 00 flour if you can find it, maida if you can’t. Preheat your cast iron pan until it smokes. Keep the sauce thin and raw. Add basil after baking.
The first pizza won’t be perfect. The second will be better. By the third, you’ll understand why the process matters.
hands-on culinary skill-building →
Have questions about the recipe or technique? Chat with us on WhatsApp — we respond fast.


