
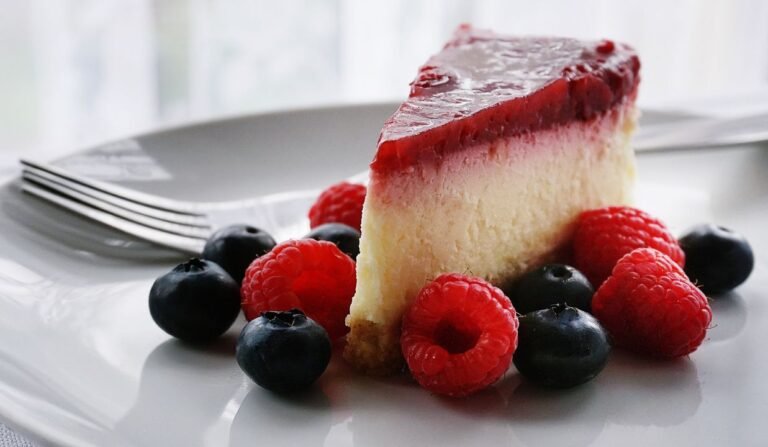
A properly tempered chocolate box looks like it came from a professional chocolatier’s studio. The secret is not special equipment. It’s understanding what tempering actually does at a molecular level, and why every shortcut produces a worse result. India’s chocolate market reached ₹28,000 crore in 2025 and is growing at 8-9% CAGR, with premium and artisanal chocolate as the fastest-growing sub-segment (Expert Market Research, 2024). That growth is driven by exactly what you want to make: gifts that look expensive, taste precise, and feel considered.
This guide covers couverture chocolate tempering for gifting boxes, from choosing the right chocolate to achieving the glossy snap-finish that makes people ask “where did you buy these?”
artisanal chocolate techniques →
Key Takeaways
– Couverture chocolate (min. 32% cocoa butter) produces a professional glossy finish; compound chocolate does not.
– Tempering forces cocoa butter into Form V crystals, the only form that gives shine and snap.
– The seeding method is the most reliable technique for home use, requiring no marble surface.
– Setting chocolate at 16-18°C (not in the refrigerator) prevents condensation bloom.
– India’s premium chocolate segment is growing at 8-9% CAGR (Expert Market Research, 2024), making artisan gifting boxes a relevant skill right now.
What Is Couverture Chocolate and Why Does It Matter for Gifting?
Couverture chocolate must contain a minimum of 32% cocoa butter by regulation, compared to compound chocolate, which substitutes vegetable fat entirely. That higher cocoa butter content is what makes tempering possible, and what gives finished bonbons their characteristic mirror gloss and clean snap. Without it, you’re working with a fundamentally different material.
Compound chocolate (brands like Morde are widely available across India) melts at a lower temperature, requires no tempering, and is much more forgiving for beginners. But it cannot produce a true glossy finish or a clean snap on unmoulding. Couverture brands like Callebaut, Valrhona, and Weiss behave differently, because cocoa butter is a polymorphic fat. It can crystallise in six different structural forms, and only one of them looks and tastes right.
compound vs couverture explained →
For gifting, the visual difference matters. A compound chocolate bonbon looks homemade. A couverture bonbon looks like it came from a high-end shop. Same filling, same mould, same gift box. Entirely different impression on the person receiving it.
Callebaut couverture is available in India through specialty baking suppliers including IBS, The Baking Store, and Amazon India. 400g packages typically range from ₹500-800 depending on cacao percentage. For a single gifting box of 16 pieces, 200g is enough to get started.
What Is Tempering and What Does It Do to Chocolate?
Tempering is a guided crystallisation process. Cocoa butter can form six different polymorphic crystal structures (Form I through Form VI), and most of them produce chocolate that is dull, soft, or chalky. Form V is the target: it’s the structure that produces the glossy surface, the clean snap, and the stable shelf life that proper chocolate is known for (Serious Eats, chocolate science).
Untempered chocolate is a random mixture of crystal forms. When it sets, it looks grey and streaky, crumbles instead of snapping, and melts unevenly on the tongue. You’ve probably seen this on chocolate left in a warm car, or on the surface of old chocolate left in a warm pantry. That grey coating is fat bloom: cocoa butter that crystallised in the wrong form after the fact.
The tempering process works in three temperature stages, all of which matter.
Stage 1 – Melt completely: Heat dark chocolate to 50-55°C. This melts all six crystal forms and gives you a clean slate. No crystal memory remains. Milk chocolate uses 45-50°C; white chocolate uses 40-45°C.
Stage 2 – Cool to seed temperature: Bring dark chocolate down to 27-28°C. At this temperature, Form V crystals begin forming spontaneously. Other unstable forms also start forming here, which is why you can’t stop at this stage.
Stage 3 – Raise to working temperature: Bring dark chocolate up to 31-32°C. This narrow temperature band melts out all unstable crystal forms while leaving Form V intact. Milk chocolate works at 29-30°C; white chocolate at 27-28°C. One or two degrees outside this range produces inconsistent results.
| Chocolate Type | Stage 1 — Melt | Stage 2 — Cool | Stage 3 — Work Temp |
|---|---|---|---|
| Dark Chocolate (72%+) | 50–55°C | 27–28°C | 31–32°C |
| Milk Chocolate | 45–50°C | 26–27°C | 29–30°C |
| White Chocolate | 40–45°C | 25–26°C | 27–28°C |
Source: Standard confectionery tempering guidelines; Florence Academy Couverture Chocolate course
A properly tempered batch will begin setting visibly within 2-3 minutes at room temperature and will have a visible sheen on the surface. If it’s still liquid after 5 minutes at 20°C ambient temperature, it’s not tempered. Start again.
What Are the Three Methods for Tempering Chocolate at Home?
Method 1: Tabling (Traditional, Best for Large Batches)
Tabling is the classic professional technique. Melt your full chocolate quantity to 50-55°C. Pour two-thirds of it onto a cool marble or granite surface. Work it with a bench scraper and palette knife in a spreading-and-gathering motion until the temperature drops to 27-28°C. The chocolate will visibly thicken and develop a slight sheen.
Add the cooled chocolate back to the remaining one-third (still warm in the bowl). Stir together. The combined mass should reach 31-32°C. If it’s too cool, warm gently over a double boiler for five seconds at a time.
Tabling works well for batches over 500g. Below that, the mass cools too quickly on the marble and you overshoot the seed temperature before you can react.
Method 2: Seeding (Best for Home Use)
Seeding is the most reliable method for home chocolatiers, and it requires no marble surface.
Melt two-thirds of your couverture to 50-55°C. Finely chop the remaining one-third and add it to the hot chocolate in three additions, stirring continuously between each. These chopped pieces are already in temper, carrying properly formed Form V crystals. They act as a template, seeding crystal formation in the melted portion.
Stir until all added chocolate melts and the temperature stabilises at 31-32°C. This takes 5-8 minutes of stirring. The chocolate will thicken slightly as tempering occurs.
: This is Chef Monila’s preferred method for workshop demonstrations at Florence Academy. The seeding method gives students clear visual feedback: as the chocolate approaches working temperature, it thickens noticeably on the spatula and takes on a visible sheen. The tabling method requires feel and speed that takes months to develop. The seeding method gives beginners a reliable visual cue from the very first session.
hands-on chocolate workshops →
Method 3: Microwave Method (Best for Small Batches Under 200g)
Chop chocolate finely and place in a dry microwave-safe bowl. Heat at 50% power in 30-second bursts, stirring thoroughly after each. Stop microwaving when approximately 75% of the chocolate is melted. Stir continuously until the residual heat melts the remaining pieces.
Check temperature. If done correctly, the chocolate should sit around 31-32°C after stirring. If it’s above 34°C, you’ve overshot and need to re-seed.
The microwave method works, but it’s less forgiving. There’s no tabling movement to encourage crystal formation, and the uneven heat distribution in most microwave ovens means you need to stir more than you think. For a 16-piece gifting box, it’s adequate. For a larger order, use the seeding method.
: Most home tempering failures are not caused by wrong technique. They’re caused by a single drop of moisture. Water makes chocolate seize: it turns grainy, stiff, and completely unusable for moulding in seconds. Even steam from a nearby kettle can cause this. Before beginning any tempering session, dry every bowl, spatula, bench scraper, and mould with a clean cloth. Run them under a fan for 60 seconds if needed. This single precaution eliminates roughly 70% of beginner failures before technique even enters the picture.
How Do You Make a Chocolate Gifting Box from Scratch?
The process for a 16-piece gifting box uses 200g of tempered dark couverture as a minimum. Here’s the full sequence, step by step.
Step 1 – Temper your chocolate. Use the seeding method above. Keep a digital probe thermometer close. Working temperature for dark couverture is 31-32°C. Check it every few minutes and warm briefly over a double boiler if it drops below 30°C.
Step 2 – Fill the moulds. Pour tempered chocolate into a clean, dry polycarbonate mould until each cavity overflows slightly. Tap the mould firmly on the counter five or six times to release air bubbles. Then invert the mould over parchment paper, letting excess chocolate drain. This creates hollow shells. Use a bench scraper to clean the top surface. Let the shells set for 3 minutes at room temperature.
Step 3 – Add your filling. Pipe ganache, caramel, or praline into each shell, leaving a 2mm gap at the top. Don’t overfill: the cap layer needs to adhere to the shell edge, not the filling.
Step 4 – Cap the shells. Pour a fresh layer of tempered chocolate over the mould, scrape level with a bench scraper, and let set for 5 minutes at room temperature.
Step 5 – Set at the right temperature. This is where most beginners make their biggest mistake. Do not put the mould in the refrigerator. Refrigerator temperatures (4-8°C) cause moisture condensation on the chocolate surface, which destroys the gloss and causes sugar bloom. Set the mould in an air-conditioned room at 16-18°C for 20-30 minutes.
Step 6 – Unmould. Tap the mould firmly on the counter. Well-tempered chocolate contracts slightly as it sets, pulling away from the polycarbonate walls. It releases cleanly with one or two taps. If pieces stick, the chocolate was not properly tempered.
Step 7 – Package. Place each piece in a candy cup (glassine or foil-lined). Arrange in a kraft or rigid gift box. Add a ribbon, a small card, and a use-by date label.
Florence Academy’s couverture chocolate course module ends with a blind-testing session where external visitors evaluate student work. Students who complete the full tempering and moulding module produce gifting boxes that are consistently rated “looks professionally made” by those visitors, with no prior information about who made them. The most common surprised reaction from visitors: “You made these yourself?”
structured couverture chocolate course →
What Fillings Work Best for Gifting Chocolate Boxes?
The right filling depends on how long the gift needs to stay fresh, how much prep time you have, and the preferences of the person receiving it. These five options cover every gifting scenario, from a same-day delivery to something made five days in advance.
Dark ganache is the most reliable choice for gifting. Heat fresh cream to just below boiling, pour over chopped dark chocolate, and stir from the centre outward until smooth. Cool to 26-28°C before piping. Shelf life is 5-7 days at room temperature, 2 weeks refrigerated.
Dry caramel is more complex but impressive. Melt sugar in a dry pan over medium heat without stirring until it turns deep amber. Add warm cream carefully (it will bubble violently). Stir until smooth. Cool before piping. Shelf life is 5 days at room temperature.
Pistachio praline is the most popular filling in premium Indian gifting boxes. Roast pistachios lightly, blend with caramelised sugar until a thick paste forms. Shelf-stable for up to 2 weeks. It’s also the most visually distinctive filling when you cut a bonbon open.
Mango ganache works specifically for summer gifting. Fresh mango pulp blended with white chocolate and a small amount of cream. Refrigerate and consume within 3 days. It’s vivid, seasonal, and unexpected inside a dark chocolate shell.
Inclusions only is the fastest option, and often the most visually striking. Skip the filling entirely. Press a pistachio half, a dried rose petal, and a flake of sea salt onto solid chocolate before it fully sets. Beautiful, done in 10 minutes, shelf-stable for 3 weeks.
Ready to learn from expert chefs? Explore Courses at Florence Academy
Frequently Asked Questions
What is the difference between couverture and compound chocolate?
Couverture chocolate contains a minimum of 32% cocoa butter, which allows it to be tempered into a glossy, snapping result. Compound chocolate replaces cocoa butter with vegetable fat. It requires no tempering, melts more easily, but cannot achieve the same shine, snap, or flavour. For gifting boxes, couverture is the professional standard. Compound is suitable for coatings, dipping, and bulk production where appearance is secondary.
compound chocolate course overview →
Why did my tempered chocolate turn grey and streaky?
Grey streaks, or “bloom,” mean the chocolate either was not properly tempered, was set in the refrigerator (condensation disrupts crystal formation at the surface), or was stored at fluctuating temperatures. The streaks are fat bloom (cocoa butter migrating) or sugar bloom (sugar crystals forming). Neither is mould or dangerous, but both are cosmetically unacceptable for gifting. Prevent by setting at 16-18°C in a climate-controlled room, never in the fridge.
Can you temper chocolate without a thermometer?
Experienced chocolatiers use the lip temperature test: 31-32°C feels just slightly cool on the lower lip, which is slightly warmer than body temperature. But for beginners, this feedback is too subtle to rely on. A digital probe thermometer costs ₹300-600 on Amazon India and removes all guesswork. One batch of wasted couverture, at ₹500-800 per 400g, costs more than the thermometer. Buy the thermometer first.
How long does a homemade chocolate gifting box last?
Solid tempered chocolate with no filling: 3-4 weeks at 16-18°C, away from light and moisture. Dark ganache-filled: 5-7 days at room temperature, up to 2 weeks refrigerated. Mango ganache: 3 days, refrigerated only. Pistachio praline-filled: 2 weeks at room temperature. For any gifting situation, making and delivering within 5 days gives the best eating experience, even for shelf-stable pieces.
The Difference Is in the Crystal
Every gifting chocolate that comes out of a professional kitchen looks the way it does for one reason: the chocolatier controlled crystallisation. Form V crystals don’t form by accident. They form because someone brought chocolate to the right temperature, cooled it deliberately, raised it precisely, and poured it into a dry mould in a room without temperature fluctuation.
That process is learnable. It takes attention, a thermometer, and the patience to do it again when the first batch isn’t right. Most people who try couverture tempering at home succeed on their second attempt, not their first.
What you produce from that process is genuinely different from anything compound chocolate can achieve. The gloss, the snap, the way it contracts cleanly from a polycarbonate mould, the way it melts evenly on the tongue rather than in a waxy film: these are not aesthetic preferences. They’re the direct result of controlled crystallography. And they’re the reason the person who receives your gifting box will ask where you bought it.
Have questions? Chat with us on WhatsApp — we respond fast.
About the Author: Chef Monila Surana has 18 years of experience in pastry and chocolate arts and leads the confectionery curriculum at Florence Academy of World Cuisines, Ahmedabad.


